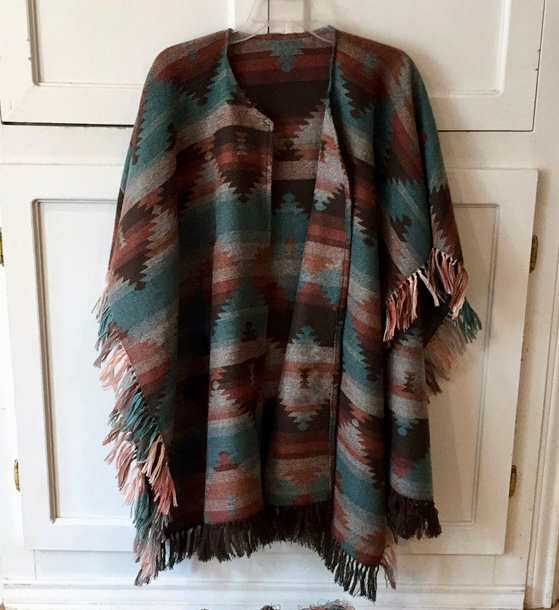
Inspired by the look of the Andean Poncho and a great piece of fabric, I designed the AZTEC PONCHO WITH FRINGE. What a great accessory for cooler weather. I got myself to Joann Fabrics and searched for the perfect fabric that would allow me to make what I now call the
Aztec Jacquard Brown Orange Teal Fabric 100& Acrylic.
To start I laid the fabric out and using the motifs as a guide for evenness I cut a rectangle that was 70″ long by 46″ wide. So the 59″ width of the fabric allowed me enough room to find 7 motifs across. The center motif was the center of the poncho. When I cut along the sides it came to 48″ wide. 9 motifs vertically came to 70″ so the shoulders sit on the middle of the 9 motifs. That is where the neck opening is. So I cut a straight line up to the shoulder and made a triangle opening that followed the center motif. Clever, huh?

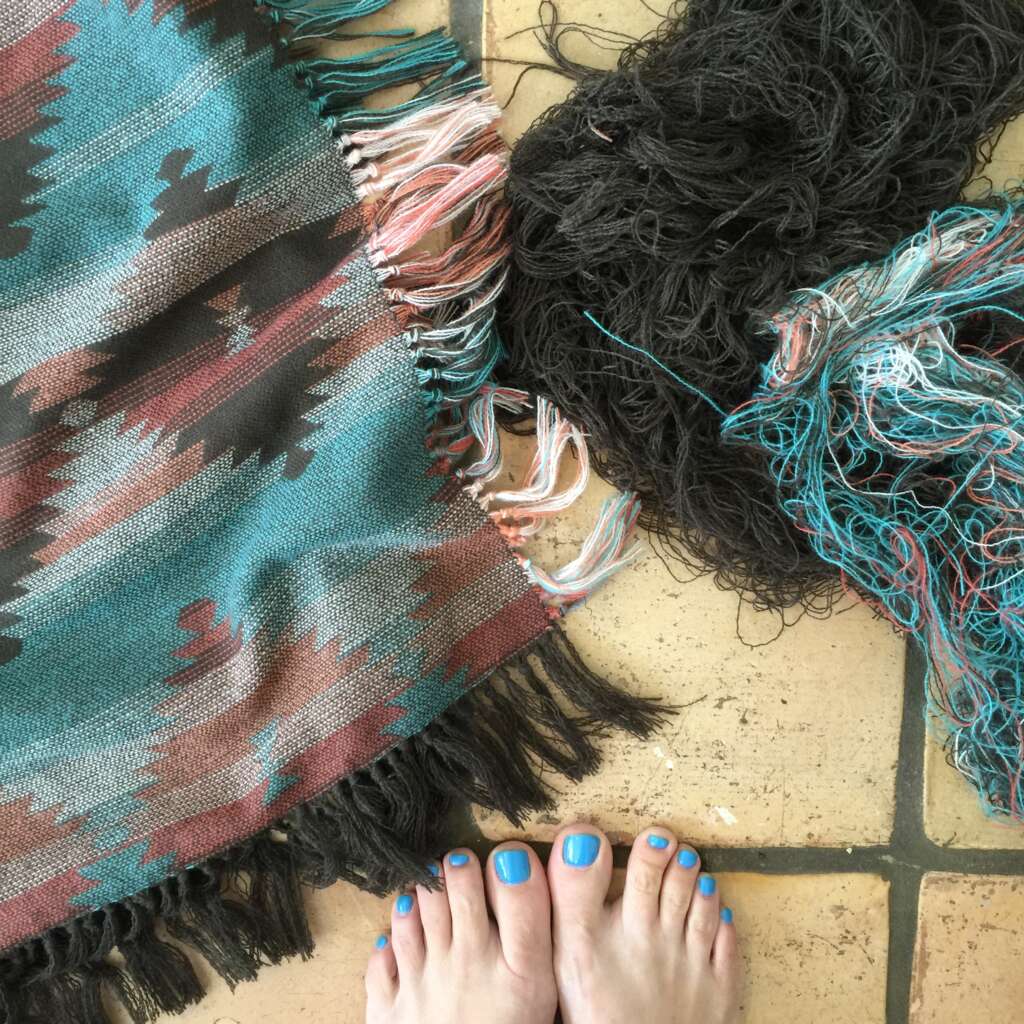
I wanted a nice lengthy fringe. To get that I measured 3.5″ from the bottom of each end and the sides I took a fabric pencil and marked the line.

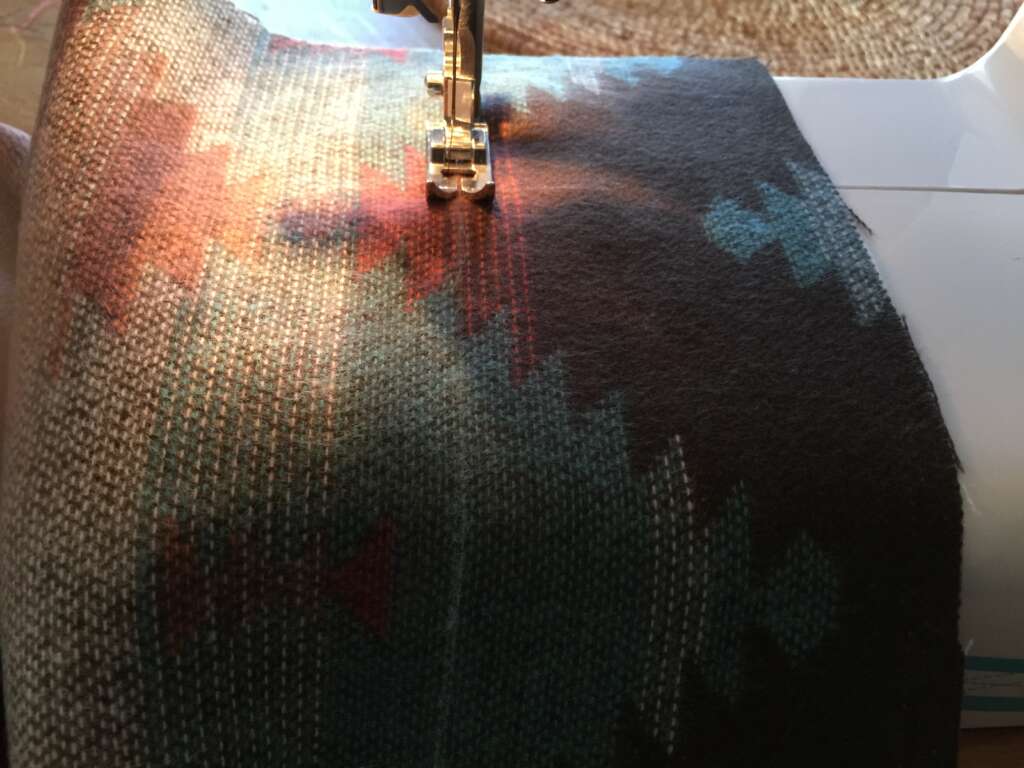
Then with my sewing machine I ran a zigzag stitch along the line. I did this for the bottom and side openings.
I settled in and began to unravel the strands of thread one by one, sometimes two at a time. This part takes a lot of patience. Once the strands were exposed I decided to tie them together. I worked around the bottom and sides of the poncho.

ow for the border around the inside collar I took an iron and carefully folded over the edge about a 1/2 inch, then folded again and pressed in place so I could easily sew is closed. Going around the neck opening was a little tricky but I got it!
The poncho at this point looked like this:
Starting with the right side facing, and using a skein of , which matched perfectly, I grabbed a tiny pointed crochet hook (aka an ) so I could easily poke through the fabric, and set to adding the border. Used the hem as a guide I added stitches approximately halfway between the edge and the sewn seam. I also marked my thumb to be able to evenly space my stitches.

Pulling the yarn through was a bit tricky because it tended to split, so I employed a second crochet hook (size B) to work the single crochet once I had the yarn through the fabric. A bit of patience is required here as well but worth it!
After the beginning row, I turned the work and single crocheted back to the beginning, then I turned again and single crocheted back.

With the crocheted border complete, I cut the yarn and with a large eye needle wove in the loose ends.
I opened the and tugged on the straps to find out that they came loose! So I got my E6000 glue out and reapplied them to make sure they would stay in place. Once good and dry (a couple of hours later). I decided where I wanted the toggle placed. I considered place it around the neck, but decided instead to place it at the waist. Using in dark brown, and an embroidery needle, I attached the toggle to each side. I intentionally stitched through the straps as well just to make sure they wouldn’t come loose again 🙂
The poncho wasn’t complete without a way to keep the neck closed so I used a pair of abalone buttons I had purchased from Etsy Seller Earth Gatherings.
With DMC Pearl Cotton thread in dark brown I attached the buttons to either side of the neck. Then I made a crochet chain of 20 stitches with a small Size B crochet hook and closed the chain with a slip stitch. I then attached the tails to the right side button by wrapping and knotting a few times, then I wove the loose ends. Here are the photos:


I have to say this was really a fun project and I am very pleased with how it turned out. With the discounts available at Joann’s it was an affordable project too!

Pick up a Yarn Trail Passport ($1), shop your favorite local yarn stores, collect stamps, and enjoy small thank-you gifts along the way.